Floating shelves are one of the most stylish and practical choices for home decor. They not only add personality to a room and provide extra storage, but also maintain a sleek and modern look—all without taking up floor space. Best of all, you don’t need a professional to install them. With the right tools, a little patience, and this step-by-step guide, you can install floating shelves yourself and save money.
Why Choose Floating Shelves?
Before we begin, let’s first look at why floating shelves are so popular. Their sleek, support-free design makes them appear to “float” on the wall. This not only looks elegant but also easily fits into a variety of interior styles—from minimalist modern to rustic country.
Floating shelves are also highly functional. You can use them to display books and decorative items in the living room, store pots and dishes in the kitchen, or towels and toiletries in the bathroom. Because floating shelves can be installed at any height, they offer flexible storage solutions that perfectly fit your space.
What you’ll need to install floating shelves
Have all the necessary tools and materials ready before you begin. Preparation will make installation go more smoothly and prevent unnecessary problems later on.
List of tools and materials:
Floating shelf set (including shelves and brackets or mounting hardware)
- Spirit level
- Drill and drill bits
- Tape measure
- Wall detector
- Pencil
- Wall anchors (if you’re not drilling holes in the wall studs)
- Screwdriver
Step 1: Choosing the right location
Determining the installation location for your shelves is the first and most important step. Consider both functionality and aesthetics. For example, in the kitchen, the shelves should be easily accessible, while in the living room, they should visually complement the surrounding furniture or artwork.
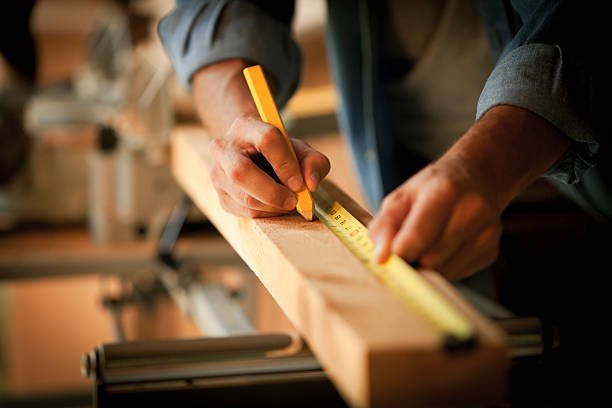
Use a tape measure to mark the height at which you want to install the shelves. If you’re installing multiple shelves, make sure there’s enough space between them. Generally, a distance of 30 to 40 centimeters (12 to 16 inches) is optimal.
Step 2: Locate the Wall Stud
For a secure installation, it’s best to attach the floating shelves to a wall stud. Use a wall stud finder to locate the stud and lightly mark its position with a pencil. If you can’t find a wall stud in your chosen location, you can still use heavy-duty wall anchors specifically designed for drywall to install the shelves. Just make sure they can support the weight you plan to place on the shelves.
Step 3: Mark the Installation Points
Rest the shelf bracket (or backing) against the wall where you want to install the shelves. Use a level to ensure it’s perfectly level, then mark the screw hole locations with a pencil. This step is crucial: even a slight misalignment of the bracket can cause the shelves to be crooked or appear uneven after installation.
If you’re installing multiple shelves, lightly mark a pencil line on the wall with a level. This will help ensure all the shelves are perfectly aligned.
Step 4: Drill Pilot Holes
Now it’s time to drill the holes. Using the marks you made earlier as a guide, drill small pilot holes into the wall. Pilot holes make it easier to insert screws and prevent the wall from cracking or the drywall from tearing.
If you’re drilling into the studs, a standard drill bit will suffice. If you’re drilling into the drywall, use a drill bit slightly smaller than the wall anchor and gently tap the anchor in until it’s flush with the wall.
Step 5: Install the Brackets
Align the brackets or backsplash with the drilled holes and tighten them securely with a screwdriver or drill. Make sure they’re secure—loose brackets can cause the shelf to wobble later.
After tightening the screws, use a level to double-check the alignment of the brackets. Making a few minor adjustments now will prevent many problems later.
Step 6: Install the shelves
Once the brackets are securely fastened, slide the floating shelf onto it. Depending on the design, the shelf may click into place immediately or require screws on the bottom.
Gently rock the shelf back and forth to ensure it’s secure and stable. If it feels loose, tighten the screws or adjust the position of the brackets.
Step 7: Decorate and enjoy your new shelves
Once the floating shelves are in place, you can start decorating! Add some items to the shelf, such as plants, books, candles, or picture frames. Remember: less is more; too much is not enough.
- If wall studs are unavailable, wall anchors are crucial for stability.
- Inaccurate measurements: Always carefully check the dimensions before drilling.
Spending a few extra minutes on careful planning and measuring will ensure a professional and aesthetically pleasing finish and prevent crooked installations.
Floating shelf maintenance tips
Floating shelves require little maintenance, but proper care can extend their lifespan. Wipe them regularly with a soft cloth to remove dust and avoid using harsh cleaners that can damage the surface. If you notice wobble over time, check the screws and tighten them as needed.
If your shelves are made of wood, consider occasionally applying a protective wax or oil to keep the surface looking like new.
Frequently asked questions about installing floating shelves
1. Can I install floating shelves on a drywall?
Yes. Be sure to use wall anchors specifically designed for drywall and don’t overtighten the screws to prevent cracking.
2. How much weight can a floating shelf support?
This depends on the type of shelf and the installation method. Shelves attached to wall posts typically support a greater weight, around 30-50 lbs (14-23 kg), while drywall anchors usually only support 15-25 lbs (7-11 kg).
3. What if I don’t have a wall post detector?
You can manually test the wall post with a small nail, or look for visual cues such as outlets or switches, which are often installed near wall posts.
4. Should I paint or prepare the shelf before installation?
It’s best to paint or stain it beforehand to prevent staining the wall. Make sure the paint is completely dry before installation.
5. Can the floating shelf be removed or moved later?
Yes, you can remove it by unscrewing the bracket screws. If you need to move the shelf, fill the original holes with putty and repaint them to maintain a clean look.
Conclusion
Installing floating shelves yourself is a simple and rewarding project that can transform any room in just a few hours. With the right tools, a well-thought-out plan, and plenty of patience, you can achieve professional results without hiring professionals.
Floating shelves not only enhance the style and functionality of a room but also allow you to create a personalized space within your budget. So grab a drill, take careful measurements, and start building a wall that showcases your taste and creativity—installing one floating shelf at a time.